How To Submit a Form Using React
This example will walk you through everything you need to know to process form submissions with Formeezy and React. Below you'll find multiple implementations using both React State as well as event FormData.
Both of these examples include support for file uploads as well as the optional honeypot bot-field for spam prevention. Axios is the popular Fetch library used in these examples, but any library you would prefer will work just fine.
Overview
- Create a new Form Endpoint
- Submit a Form Using React State
- Submit a Stateless Form with FormData
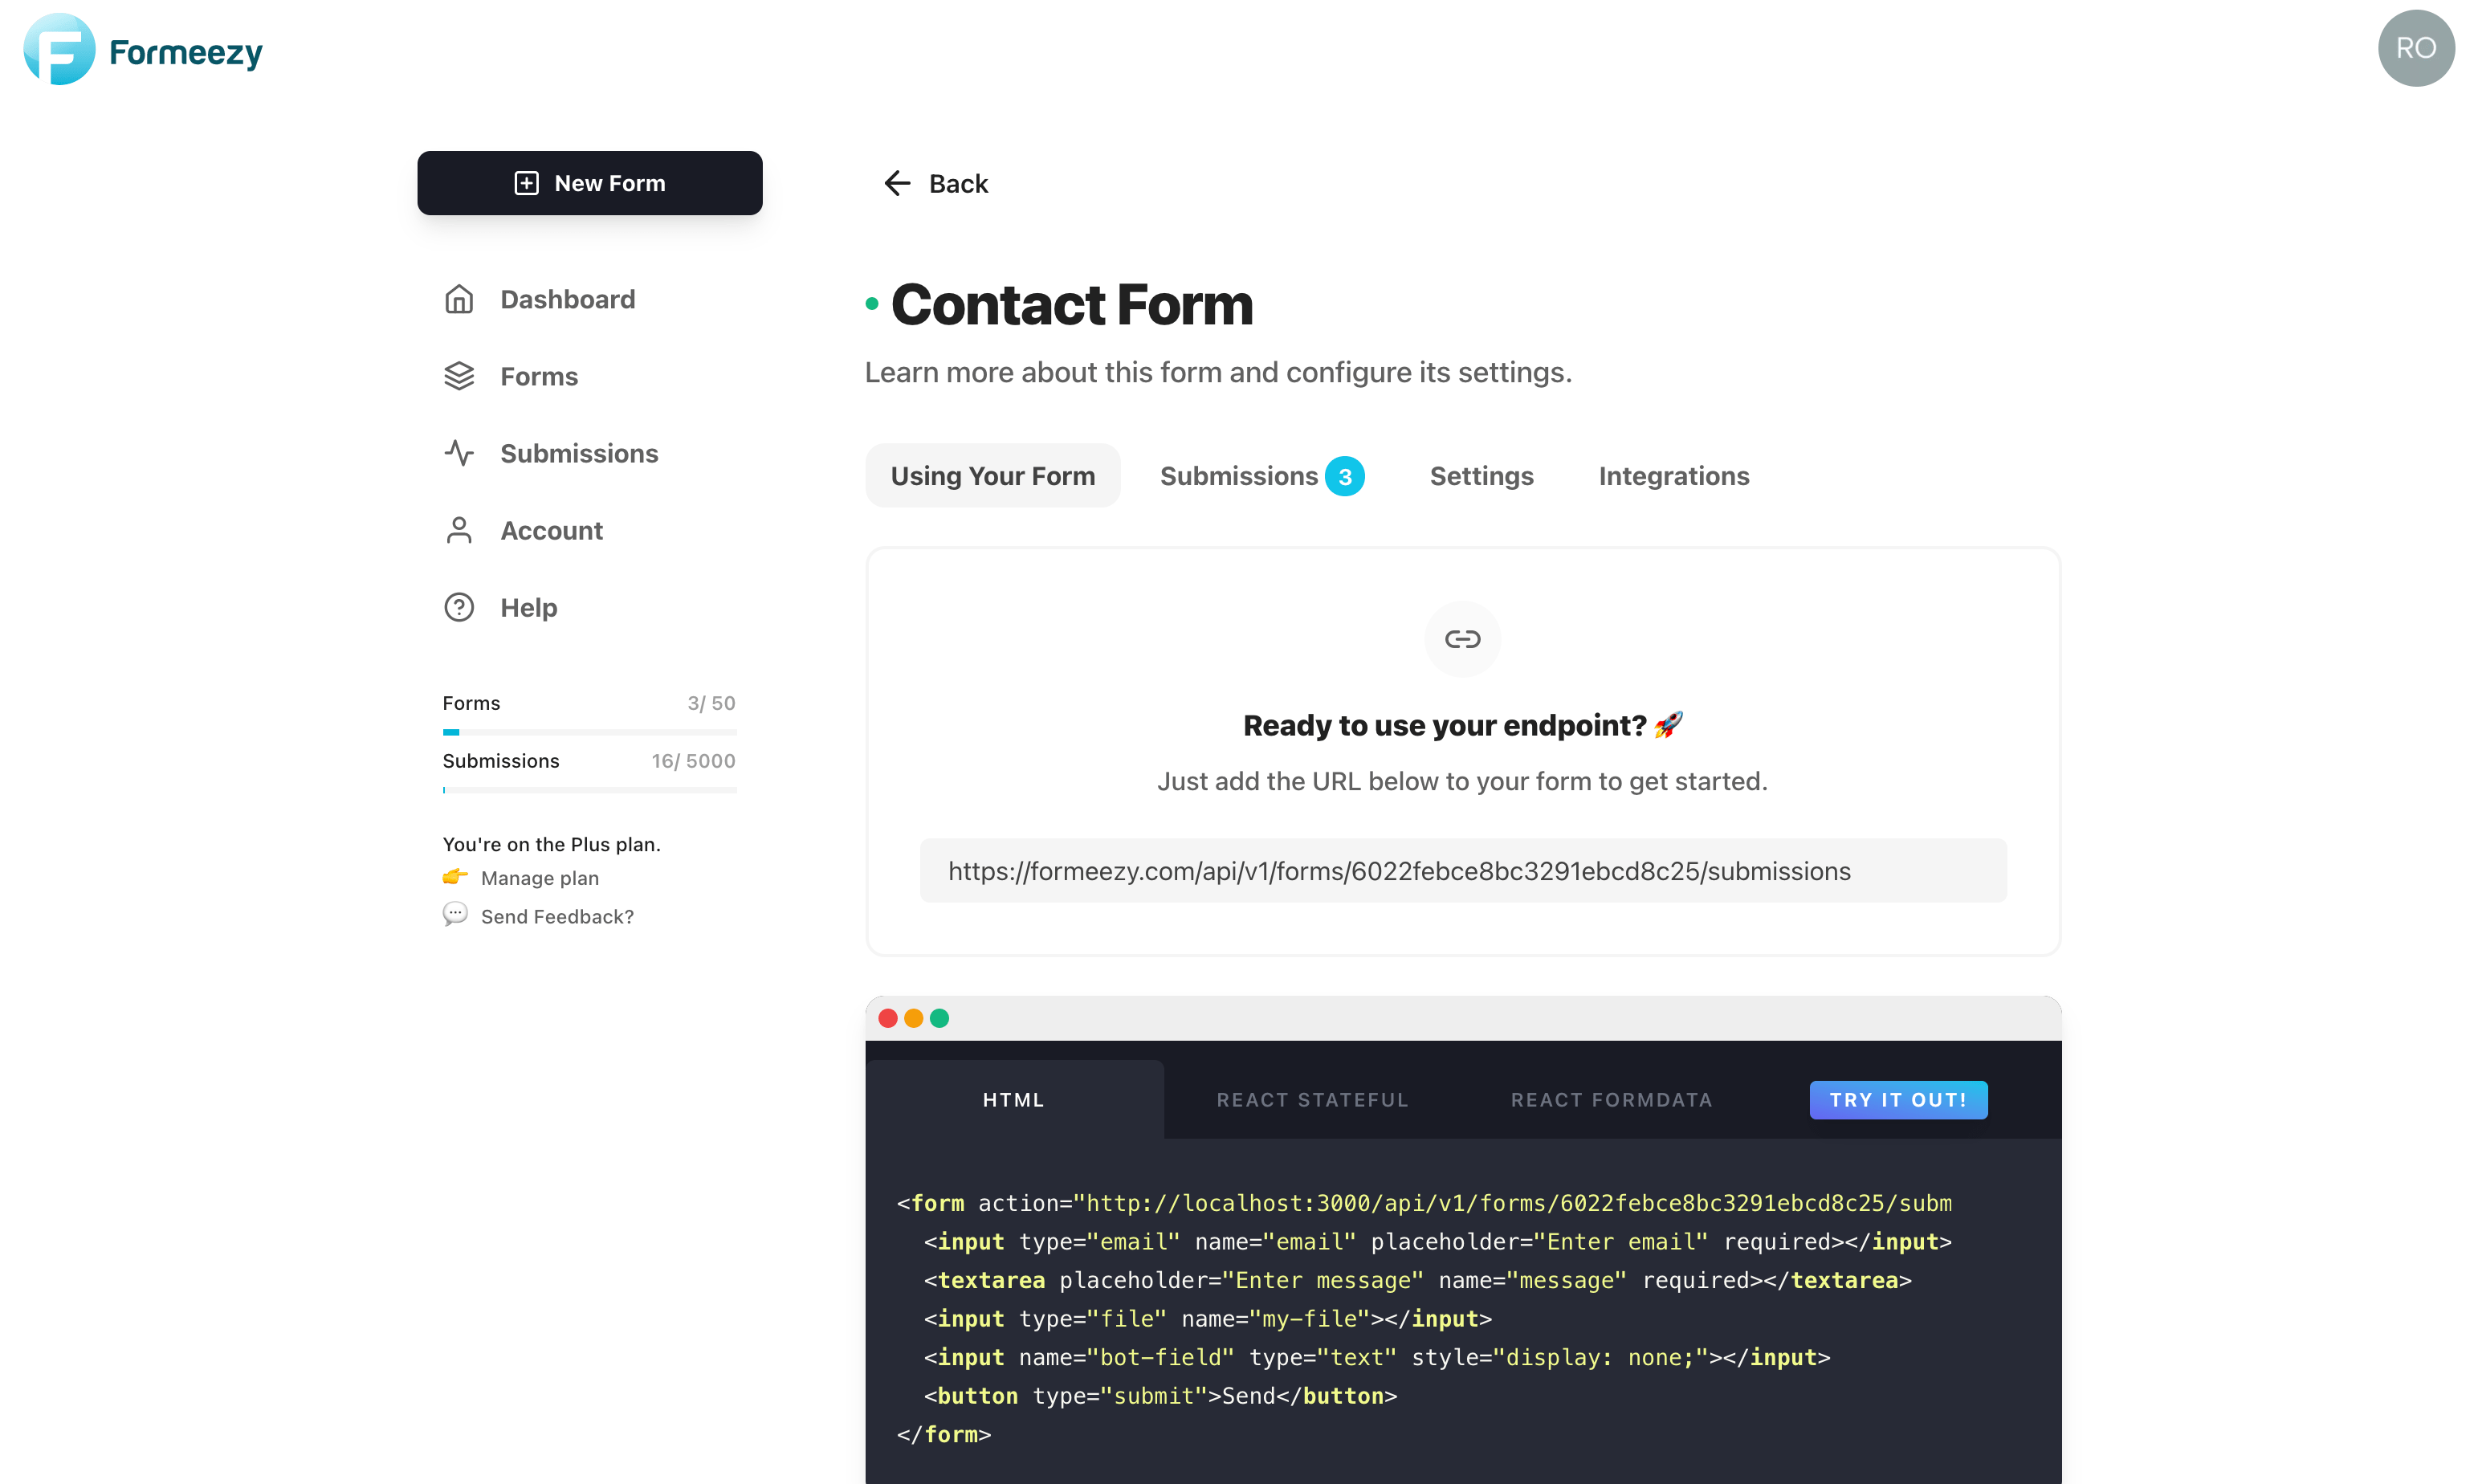
Step 1 - Create a new form endpoint
The first step to creating a form with React is to generate a new form endpoint or grab the URL of an existing one. We'll use this unique endpoint to submit and store your form submission.
Step 2 - Build your React Form
Next, we'll add your unique endpoint to your React form submit handler. Below are two different implementation options for you to choose from depending on your use-case.
React Form Using Stateful FormData + File Upload Support
This example shows an implementation using React State to store the form values. Once we're ready to submit our form, we'll convert the state object into FormData for submission. This step is optional if you're not including files, as a simple state object is acceptable as the submission body as well.
Notes
- State is the preferred choice if you would like to validate your form fields upon entry.
- You'll notice the handleChange function checks for files to parse before setting them to state. Feel free to remove this check if you're not uploading files.
import React from "react"; import axios from "axios"; function Form() { const [state, setState] = React.useState({ email: "", message: "", file: null }); function handleChange(e) { if (e.target.files) { setState({ ...state, [e.target.name]: e.target.files[0] }); } else { setState({ ...state, [e.target.name]: e.target.value }); } } async function handleSubmit(e) { e.preventDefault(); let formData = new FormData(); for (let [key, value] of Object.entries(state)) { formData.append(key, value); } // Use fetch or axios to submit the form await axios .post("{Formeezy-Endpoint}", formData) .then(({ data }) => { const { redirect } = data; // Redirect used for reCAPTCHA and/or thank you page window.location.href = redirect; }) .catch((e) => { window.location.href = e.response.data.redirect; }); } return ( <form onSubmit={handleSubmit}> <input name="email" type="email" placeholder="Enter email" onChange={handleChange} value={state.email} required /> <textarea name="message" placeholder="Enter message" onChange={handleChange} value={state.message} required /> <input type="file" name="file" onChange={handleChange} /> <input name="bot-field" type="text" onChange={handleChange} style={{ display: "none" }} /> <button type="submit">Send</button> </form> ); }
React Form Using Event Target FormData + File Upload Support
The example below is an implementation that relies upon the Event Target method to automatically capture the form values on submission. This example is stateless and depends completely on HTML validation to avoid submitting empty fields etc.
On submit, the handleSubmit function will extract the values from the form as FormData, and add them to the body of the request.
Notes:
- No additional configuration is required for file uploads
import React from "react"; import axios from "axios"; function Form() { async function handleSubmit(e) { e.preventDefault(); // Use fetch or axios to submit the form await axios .post( "{Formeezy-Endpoint}", new FormData(e.target) ) .then(({ data }) => { const { redirect } = data; // Redirect used for reCAPTCHA and/or thank you page window.location.href = redirect; }) .catch((e) => { window.location.href = e.response.data.redirect; }); } return ( <form onSubmit={handleSubmit}> <input name="email" type="email" placeholder="Enter email" required /> <textarea name="message" placeholder="Enter message" required /> <input type="file" name="my-file" /> <input name="bot-field" type="text" style={{ display: "none" }} /> <button type="submit">Send</button> </form> ); }
React Form Submission Payload
You may have noticed that both successful submissions, as well as unsuccessful (error) submissions, include a redirect in the object returned. This redirect is used to send users to a thank-you page, reCAPTCHA confirmation, Stripe Checkout session, or a default error page in the event of a form error.
If you're not using any of our default pages and would prefer to handle these yourself, feel free to disregard the redirects and manage these states internally in your form.
Successful Submission
{ redirect: "https://formeezy.com/app/thanks?success=true" }
Error Submission
{ "status": 404, "message": "Not Found: This form has been deleted, or does not exist. Please check your form URL." "redirect" : "https://formeezy.com/app/error?status=400&message=This+is+an+error+message." }
To learn more about the specific features and response payloads of the Formeezy Submissions POST endpoint, check out our API docs.