Basic Form Example
The example below will walk you through the simplest way to add a form to an HTML page or static site that will then collect submissions and store them in your Formeezy account.
Overview
- Create a basic HTML Form
- Create a new Formeezy endpoint
- Add the form to your website or app
Step 1 - Create a basic HTML form
To get started, you'll need to create an HTML form for your users to fill out and send submissions. When you create your endpoint, we'll automatically generate a starter contact form for your convenience. Feel free to copy the one below, or copy directly from the default code we create for your form.
<form action="#" method="POST"> <input type="text" name="name" placeholder="Enter name" required></input> <input type="email" name="email" placeholder="Enter email" required></input> <textarea placeholder="Enter message" name="message" required></textarea> <button type="submit">Send</button> </form>
The form attribute action="#" will control where your form data is submitted to.
Step 2 - Create a new Formeezy endpoint
Next, we're going to generate a unique endpoint for your form to submit to. Adding a new form to your account is fast and requires little to no configuration.
- Visit your Forms Dashboard
- Click "Add Form"
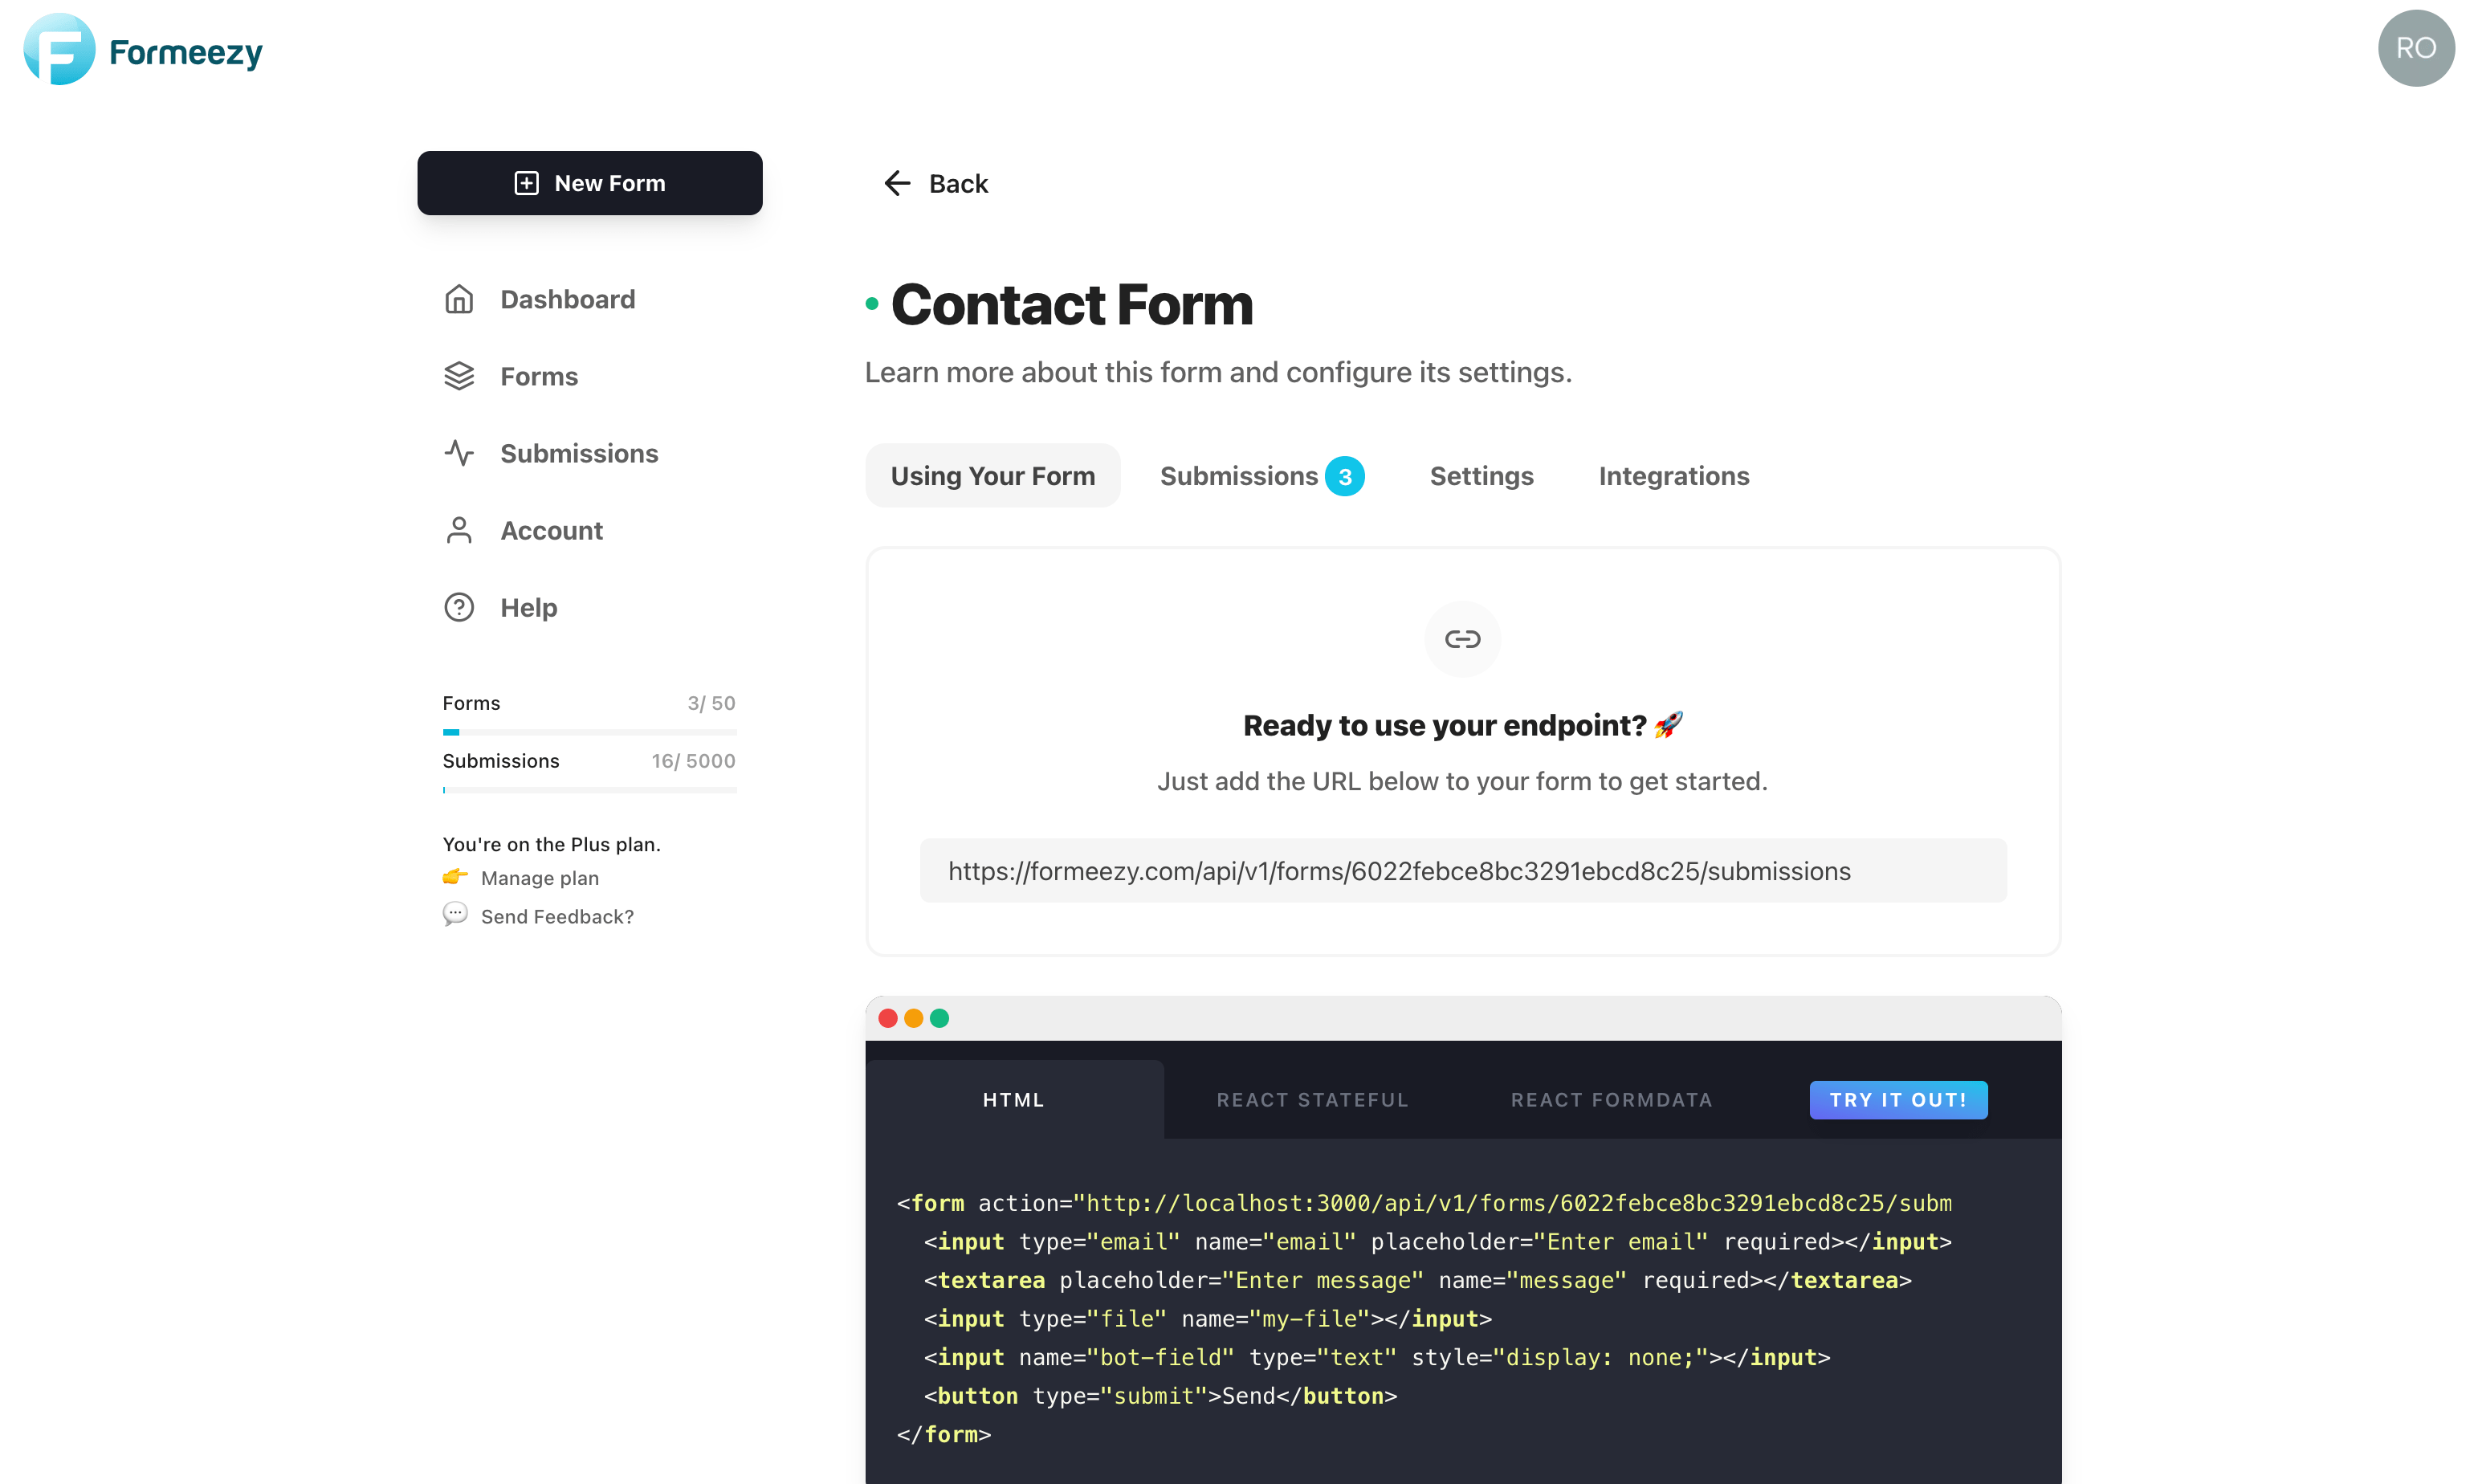
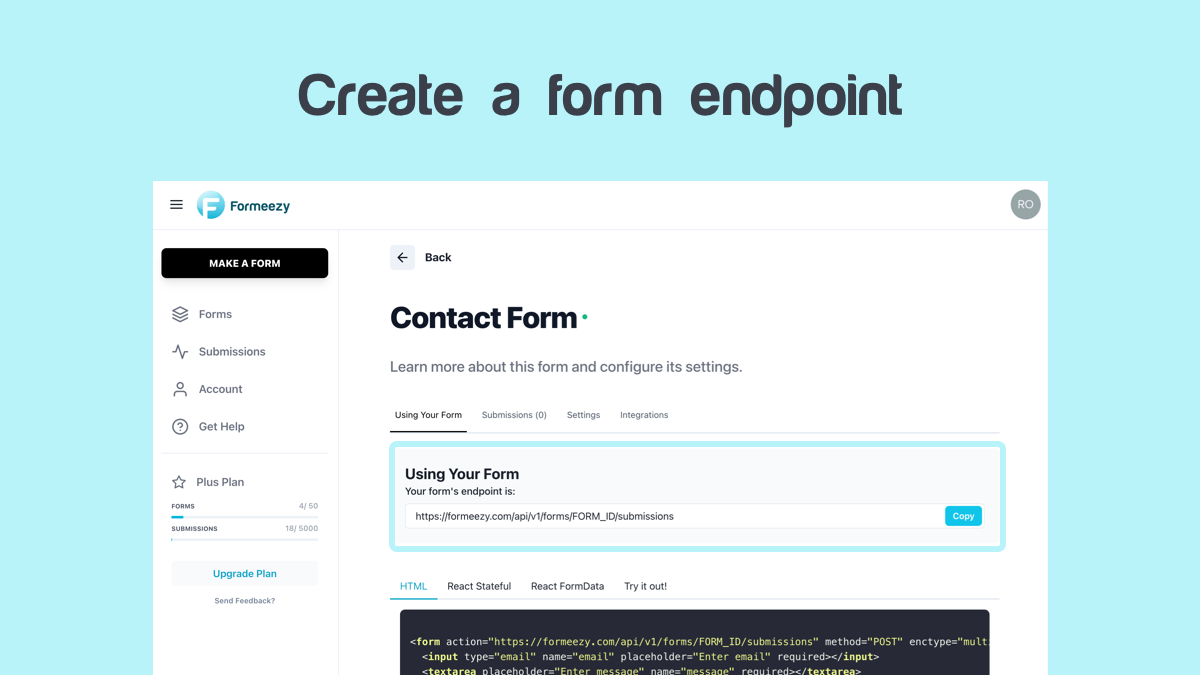
- Click "Using your form"
You'll see multiple examples for implementing your form on your website, as well as the API endpoint we generated for this form. Copy this endpoint as we'll be using it in the next step.
ENDPOINT "https://formeezy.com/api/v1/forms/FORM_ID/submissions"
Screenshot

Step 3 - Add the form to your website or app
Now that you have your HTML form and your unique endpoint, you're ready to add the form to your site and start collecting submissions. Take your HTML form we created in Step 1 and replace the action attribute with your newly generated endpoint. (Example below)
<form action="https://formeezy.com/api/v1/forms/FORM_ID/submissions" method="POST"> <input type="text" name="name" placeholder="Enter name" required></input> <input type="email" name="email" placeholder="Enter email" required></input> <textarea placeholder="Enter message" name="message" required></textarea> <button type="submit">Send</button> </form>
Add your form to your project and you're ready to go. Test it out to confirm that everything is set up to your liking, and you're done!
Time to sit back, marvel at your work, and enjoy a nice ☕ break - you earned it!
Tips and Tricks
Make sure you use the name attribute on your input fields. This is how Formeezy knows what to call your input data, and is required.
When using a basic form setup, redirects to thank-you pages and/or reCAPTCHA are taken care of automatically.
We support the following types for "Content-Type":
const AllowedContentTypes = ["json", "formdata", "www-form-urlencoded"];